









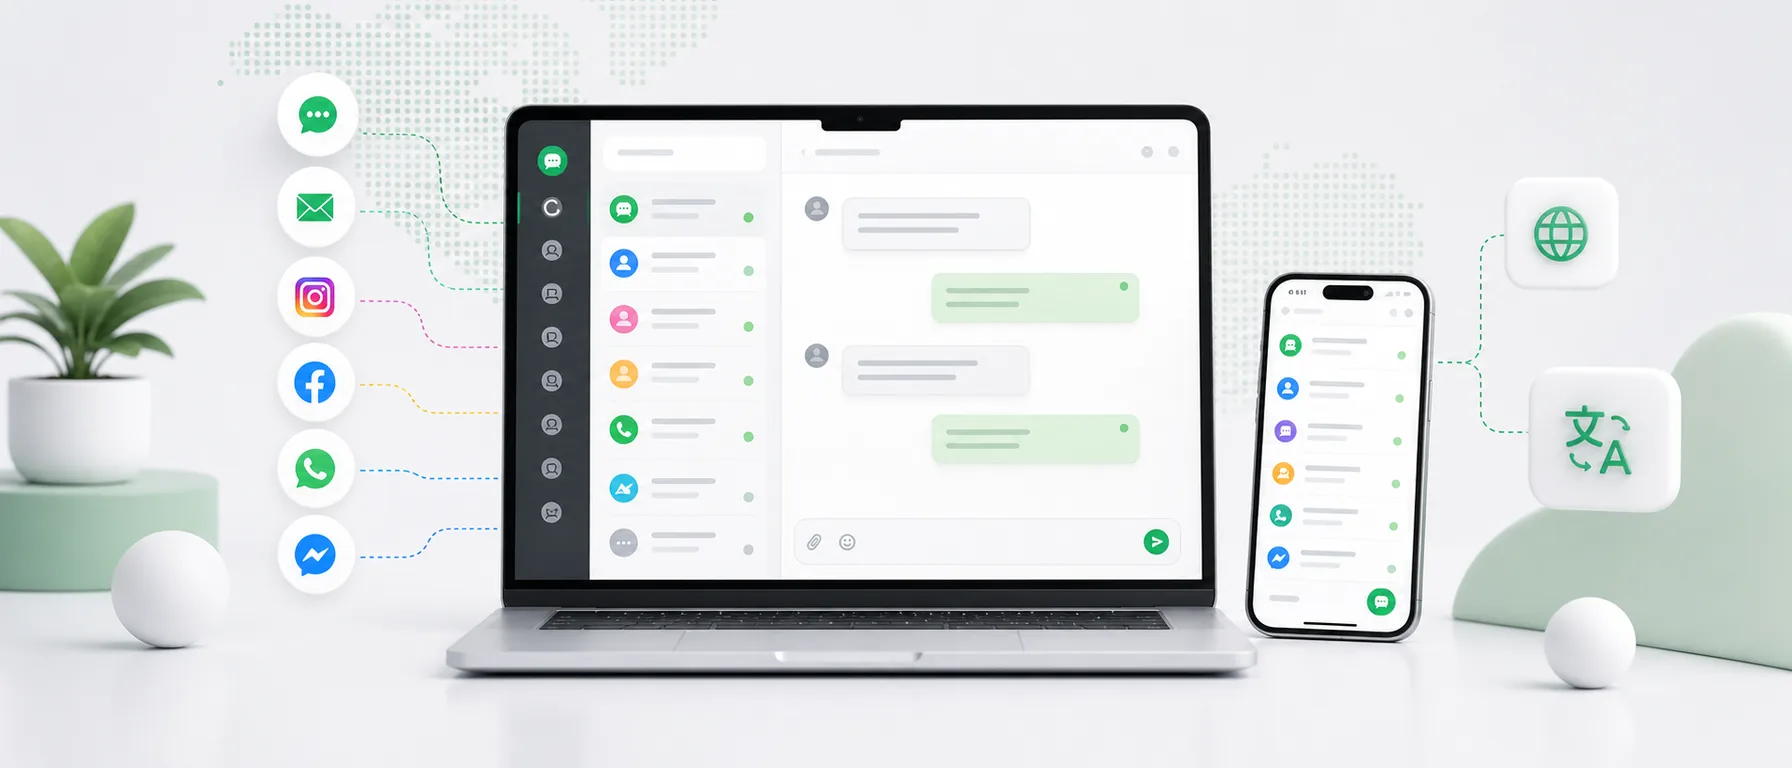
Customers do not use one communication channel. One person will write via a form or chat on the website, another via Facebook, another via Instagram or WhatsApp, and still another will send a message to Allegro or a regular e-mail.
The problem begins when each of these messages has to be checked in a different application. It’s easy to miss a question, answer twice, or waste time trying to figure out who and where was conducting the earlier conversation.
Chataptor allows you to combine different communication channels and receive messages in one panel. This is a practical way to implement an omnichannel inbox without having to constantly switch between applications. There is no need to go through complicated implementation. Most integrations come down to clicking the appropriate button, logging in to the selected website and accepting the required permissions. Learn how a shared omnichannel inbox organizes this workflow.
After connecting the channels, you can additionally use automatic translations. The customer writes in his own language, and the person handling the message can read it and prepare a response in English. Chataptor translates communications so that the company does not have to copy every message to an external translator. See how automatic conversation translation works in practice.
In this guide, we show you step by step how to:
- Create an account in Chataptor,
- Add a live chat widget to the website,
- connect WhatsApp,
- connect Facebook Messenger,
- connect Instagram,
- connect your Allegro account,
- connect Gmail or other e-mail box,
- Start handling messages from multiple channels and languages in one place.
What channels can be connected to Chataptor?
In the Channels tab, you can configure the sources from which messages from customers are to be sent.
Depending on the channels used by the company, these may include:
| Channel | Messages handled in Chataptor | Requirements |
|---|---|---|
| Website widget | Website live chat messages | Access to the website or store dashboard |
| Messages sent to the company number | Meta Business account and the relevant business assets | |
| Facebook Messenger | Messages sent to the Facebook Page | Access to the Page and Meta business portfolio |
| Messages sent to the Instagram account | A professional account connected to Meta | |
| Allegro | Messages related to the Allegro account | Allegro account and an app with a Client ID and Client Secret |
| Messages received in the company inbox | Access through Google, IMAP/SMTP or email forwarding |
You don’t have to connect everything at once. You can start with one channel, for example on-site chat, and then gradually add others.
How to create an account in Chataptor?
The first step is to register an account.
Go to the Chataptor registration page.
In the form, provide:
- Company name,
- your name,
- E-mail address,
- password.
After sending the form, open the message received at the provided e-mail address and confirm your registration. Chataptor is currently free, with no message limit and no paid features.
After logging in, go to the Channels tab. This is where the available integrations and the buttons to run them are located.
How to add a Chataptor widget to a website?
A widget is a chat window that appears on a website. The customer can use it without installing the application and without creating an account.
Step 1. Add a page in Chataptor
In the Channels tab, find the Page Widget item.
After selecting it, you will go to the settings in the Pages tab. Add your website there.
The most important data are:
- site name,
- Website address.
You can complete the remaining settings immediately or return to them later.
Step 2. Proceed to install the widget
After saving the page, go to the Widget installation tab.
There you can set, among other things, the color of the widget. You can also change the color later without re-creating the integration - just edit the parameter value:
data-primary-color
Chataptor will generate an individual code for your website. It will look similar to this:
<!-- Chataptor Widget -->
<script
  src="https://chataptor.com/widget/quantumchat-widget.umd.js"
  data-api-url="https://chataptor.com"
  data-site-id="<id-firmy>"
  data-widget-key="<klucz-widgetu>"
  data-welcome-message="Hello! How can I help you today?"
  data-header-title="Customer Support"
  data-input-placeholder="Type your message..."
  data-theme="light"
  data-position="bottom-right"
  data-primary-color="#990000"
  data-open-on="hover"
  data-translation-enabled="true"
  data-debug="false"
></script>
Don’t copy the above example directly. Please use the code generated in your account as it contains the correct values data-site-id and data-widget-key.
Step 3. Paste the code before the </body> tag
The copied code should be placed in the website code just before the closing tag:
</body>After saving the changes, the widget will appear on the website and automatically connect to your Chataptor account. Messages sent by customers will start going to the panel.
How to install Chataptor widget on WordPress or WooCommerce?
WooCommerce runs on WordPress, so the widget installation process is the same in both cases.
The easiest method for a non-technical person is to use a plugin that allows you to add code to the page footer, for example:
- WPCode,
- Head & Footer Code,
- Header and Footer Scripts.
After installing the plugin:
- Open its settings,
- Find the field for the code placed in the footer or before
</body>, - Paste the full widget code generated by Chataptor,
- save settings,
- Clear page cache,
- Open the page in private mode and check if the widget appears.
A technical person can also add code using the wp_footer engine or in the footer file of a child theme. It’s not a good idea to paste it directly into your main theme because updating the theme may remove your changes.
Supporting documentation:
How to install Chataptor widget in Shopify?
In Shopify, you can add the code to your main template file.
Before you start, it’s a good idea to create a copy of the theme you’re using.
Then:
- enter the Shopify dashboard,
- select Online Store,
- go to Themes,
- with the theme active, expand the menu and select Edit code,
- in the Layout directory, open the file
theme.liquid, - Find the closing tag
</body>, - Paste the Chataptor code directly before it,
- save changes.
After saving, refresh the store and check if the widget is visible.
Some themes also support Custom Liquid sections, but the widget code should work on all subpages. Therefore, the safest place is the global file theme.liquid.
Shopify documentation:
How to install the Chataptor widget in Shoper?
The exact name of the tab may vary depending on the panel version and template used.
Most often you should:
- log in to the Shoper administration panel,
- go to the Add-ons and integrations section,
- Open Own integrations,
- find the field labeled Page Footer, before closing
</body>, - Paste the Chataptor code,
- save changes.
In some versions of Shoper, the script can also be added via the graphic module or by editing the template used.
Shoper documentation:
Adding scripts in Shoper store modules
How to install Chataptor widget in PrestaShop?
In PrestaShop, the safest way is to use a module that allows you to add your own HTML or JavaScript code to the footer.
Possible solutions are:
- module of your own HTML/JavaScript code,
- Using the hook
displayFooter, - Adding code in the footer template of the used theme,
- Preparation of a simple module by a programmer or the company operating the store.
You should not edit the main files of the PrestaShop system. Changes should be made via a module, hook or child theme so that the store update does not remove them.
PrestaShop documentation:
How to add a widget to a regular HTML page?
If you have access to the website files:
- Open a file containing a common footer or main template,
- Find the closing tag
</body>, - Paste the Chataptor code before this tag,
- save and publish changes.
If the website is managed by a programmer or agency, just send them the generated code with short information:
Please paste this script globally on all subpages, immediately before the closing tag
</body>.
Can the widget be installed via Google Tag Manager?
Yes. If Google Tag Manager is running on the website, the widget code can be added as a Custom HTML tag.
The basic process looks like this:
- Create a new Custom HTML tag,
- Paste the Chataptor code,
- Set trigger rule on all pages,
- save and publish container,
- Check widget operation in preview mode.
This is a convenient method when the company already uses Google Tag Manager and does not want to directly edit the website code.
What can be changed in the widget code?
The code contains parameters responsible for the appearance and behavior of the chat window.
The most important of them are:
| Parameter | What is it for? |
|---|---|
data-welcome-message | Welcome message |
data-header-title | Chat window title |
data-input-placeholder | Text in the message entry box |
data-theme | Light or dark look |
data-position | Position of the widget on the screen |
data-primary-color | Widget main color |
data-open-on | How to open the widget |
data-translation-enabled | Enable translations |
data-debug | Diagnostic mode |
Do not change the data-site-id and data-widget-key values unless a new code is generated in the Chataptor panel.
How to connect WhatsApp to Chataptor?
To connect WhatsApp, you need a company number associated with resources in Meta Business.
What to prepare?
Before you start, make sure that:
- You have a Facebook account with access to company resources,
- the company has a business portfolio in Meta Business Suite,
- WhatsApp number is or can be assigned to the appropriate company account,
- You have permission to manage this number.
How to create a Meta business portfolio?
If the company does not have a portfolio yet:
- go to business.facebook.com,
- log in to the Facebook account of the person managing the company,
- Choose the option to create a business portfolio,
- enter the company name, your details and company e-mail address,
- Add or assign the resources you need, such as a Facebook page, Instagram account and WhatsApp Business account,
- Give the right people access to these resources.
The business portfolio is the place where Meta stores and organizes company pages, accounts and permissions.
Meta documentation:
Creating a business portfolio in Meta Business Suite
Connecting WhatsApp step by step
In Chataptor:
- go to the Channels tab,
- on WhatsApp, click Connect number,
- Log in with Facebook.
If you are already logged in, the following screen may appear:
Continue as…
Then:
- accept required permissions,
- Select business portfolio,
- Select the appropriate WhatsApp Business account,
- Indicate the number you want to service,
- Complete the connection process.
Meta may ask for additional confirmation of data or number. You should then follow the steps shown on the screen.
Once the integration is completed correctly, WhatsApp messages will be able to be sent to Chataptor, and replies can be sent directly from its panel.
How to connect Facebook Messenger with Chataptor?
Before you start, check that:
- The Facebook page belongs to the corresponding business portfolio,
- You have permissions to manage the page and messages,
- You will use a Facebook account that has access to this resource.
In Chataptor:
- go to the Channels tab,
- on Facebook Messenger, click Connect Page,
- log in with Facebook or select Continue as…,
- Grant access to required resources,
- Select business portfolio,
- select the page whose messages are to be sent to Chataptor,
- End process on Meta side,
- Return to Chataptor and reselect the page you want to add.
The last choice in Chataptor is important because granting permissions in Meta does not always mean activating a specific page in the communication panel.
How to connect Instagram with Chataptor?
The Instagram account should be a professional account and associated with an appropriate Meta business portfolio.
If your account is private, you may be asked to change your account type to professional when connecting.
How to prepare an Instagram account?
In Meta Business Suite:
- Choose the appropriate business portfolio,
- go to settings,
- Open the Instagram accounts section,
- Add Instagram account,
- log in to it,
- Associate them with the correct Facebook page and assign the necessary permissions.
Meta documentation:
- Adding an Instagram account to your business portfolio
- Connecting your professional Instagram account to your website
Connecting Instagram in Chataptor
- Go to the Channels tab.
- For Instagram, click Connect Account.
- Log in with Facebook or select Continue as….
- Grant access to the appropriate resources.
- Select business portfolio.
- Select the correct Instagram account.
- End process on Meta side.
- Go back to Chataptor and reselect the account you want to support.
From now on, messages from the connected account can be handled in the same panel as other channels.
How to connect your Allegro account with Chataptor?
Integration with Allegro requires creating an application in the Allegro Developer panel. Thanks to this you will receive:
- Client ID,
- Client Secret.
This is data that identifies the application when authorizing the connection.
Step 1. Start integration in Chataptor
In the Channels tab, find Allegro and click:
Connect account
Chataptor will display fields for Client ID and Client Secret as well as the redirection address that needs to be configured in Allegro.
Redirection address for Chataptor:
https://chataptor.com/channels/allegro/callbackThe address must be pasted exactly as it is.
Step 2. Create the Allegro application
Go to the page:
https://apps.developer.allegro.pl/
Log in to the Allegro account you want to connect and then:
- Select the option to register a new application,
- Enter a name, for example
Chataptor – company name, - Optionally add a short description,
- select the type of application that has access to the browser in which the user logs in to Allegro,
- as the redirection address, enter:
https://chataptor.com/channels/allegro/callback- Select permission ranges required by Chataptor integration,
- accept Allegro REST API regulations,
- register the application.
Step 3. Copy Client ID and Client Secret
After creating the application:
- Open its details,
- display access data,
- Copy Client ID,
- Copy Client Secret.
Client Secret should be treated like a password. Do not publish it or send it to people who should not have access to the integration.
Step 4. Paste the credentials into Chataptor
Return to the Channels tab in Chataptor.
Paste:
- Client ID,
- Client Secret.
Then start authorizing your Allegro account. The browser will take you to the Allegro website, where you need to confirm the connection of the application with the account.
Once approved, you will be returned to Chataptor and your account will be added as an active channel.
Allegro documentation:
How to connect e-mail with Chataptor?
In the Channels tab, next to e-mail, click:
Configure your mailbox
Then choose the appropriate method. The available solution depends on your email provider and how you manage your mailbox.
How to connect your company’s Google Workspace account?
If you use a corporate Google Workspace mailbox, your organization’s administrator may be required to mark Chataptor as trusted.
This is a one-time setup.
Manual for Google Workspace administrator
- Sign in to admin.google.com as an administrator.
- Go to Security.
- Open Access and Data Control.
- Select API Controls.
- Open external application access management.
- Wybierz opcję dodania aplikacji.
- Search for it using the OAuth client ID.
- Paste the Client ID displayed in the instructions into your Chataptor account.
- Wybierz aplikację.
- Ustaw dostęp jako Zaufana.
- Zapisz zmiany.
The change usually works quickly, but in some cases it may take longer to take effect.
Google Documentation:
Managing external applications’ access to Google Workspace
Once your application is approved, return to Chataptor and start connecting your mailbox again.
How to connect a private Gmail account?
If you have a private Gmail account, your regular account password may not work when connected via email.
You can then use the application password.
How to create a Google App password?
- Enable two-step verification for your Google account.
- Go to account security settings.
- Open the Application Passwords section.
- Create a new password for Chataptor.
- Copy the generated 16-character code.
- Paste it in Chataptor instead of your regular Gmail password.
Google Documentation:
App passwords are only available to accounts with 2-Step Verification enabled. The option may not be visible in some accounts, for example if your organization’s administrator has disabled it.
How to connect any mail via IMAP and SMTP?
If you use a different email provider, select the option in Chataptor:
IMAP/SMTP
Complete:
- E-mail address,
- nazwę nadawcy,
- IMAP server address,
- port IMAP,
- login IMAP - usually full email address,
- IMAP password or application password,
- SMTP server address,
- SMTP port,
- login SMTP - usually full email address,
- SMTP password or application password.
After completing the data, click:
Test and connect
Server data and ports can be found in the documentation of your email operator or in the hosting panel. Don’t guess at the settings as they vary from provider to provider.
If your operator supports application passwords, it is worth using such a password instead of the main mailbox password.
How to forward emails to Chataptor?
An alternative to direct connection via IMAP and SMTP is message redirection.
In this variant, all new emails are automatically sent to the address served by Chataptor.
To configure redirection:
- Add domain in Chataptor settings,
- Add the email address from which messages are to be redirected,
- Copy the redirection address provided by Chataptor,
- Open the settings of your mailbox or hosting,
- Create a rule forwarding incoming messages to the specified address,
- Perform verification if required by your email provider,
- Send test message.
This is a simple solution if you mainly want to receive messages in Chataptor.
How to start serving customers in multiple languages?
Simply combining channels solves the problem of scattered messages. The next step is to enable translations.
In the case of a widget on the website, the following parameter is responsible for this:
data-translation-enabled="true"After turning on translations, the customer can write in his own language, and the support agent can work in English. The response can be translated into the customer’s language without manually copying the entire conversation to an external tool.
The same workflow can be used for messages arriving from other connected channels.
Thanks to this, the company can serve foreign customers even when employees do not know the language of each market.
What happens when channels are combined?
After proper configuration, messages begin to be sent to one Chataptor panel.
A customer service person can:
- see which channel the message comes from,
- Read conversation history,
- Reply from one panel,
- Use automatic translation,
- Use the ready-made response template,
- Handle messages without switching between multiple applications.
This is the practical importance of omnichannel communication. It’s not just about having multiple channels. The idea is that they are all handled in one, orderly process.
How to check if integration is working?
After adding each channel, perform a simple test.
Widget on the page
- Open the page in private mode.
- Send message via widget.
- Check if it appears in Chataptor.
- Send reply from panel.
- Send a message to the connected number from another phone.
- Check if the conversation appears in the dashboard.
- Reply from Chataptor.
Facebook Messenger
- Send a message to the page from a private account.
- Check if it appears in the panel.
- Send a message to an account from another profile.
- Check reception and ability to respond.
Allegro
- Check the status of your connected account.
- Verify that Chataptor is receiving messages associated with your account.
- Send message from external address.
- Check if it appears in Chataptor.
- Send response and check delivery.
Most common problems when connecting channels
I can’t see my Facebook page or Instagram account
Most often, the Facebook account used during integration does not have sufficient permissions or the resource is in a different business portfolio.
Check:
- has the correct portfolio been selected,
- If the website or Instagram account is added to it,
- Do you have full access to the resource,
- Whether any permissions were omitted during login.
Instagram does not appear in the list
Verify that it is a professional account and that it has been linked to the appropriate Facebook Page and business portfolio.
Widget does not appear on the page
Check:
- Has the code been pasted in its entirety,
- has the correct
data-site-idbeen used, - has the correct
data-widget-keybeen used, - is the code before
</body>, - Whether changes have been published,
- has the site cache and CDN been cleared,
- whether the cookie or script consent system is blocking its launch.
Allegro rejects the redirection address
The address entered on Allegro must be identical to the address used by Chataptor:
https://chataptor.com/channels/allegro/callbackEven a slight difference may prevent authorization from being completed.
Google is blocking the connection
In Google Workspace, an administrator may be required to mark an application as trusted.
For private Gmail, you may need two-step verification and an app password.
IMAP or SMTP fails the test
The most common causes are:
- Invalid server name,
- Incorrect port,
- regular password instead of application password,
- IMAP access disabled,
- blocking login by external applications,
- Incorrect login,
- Additional security of the mail operator.
Chataptor launch checklist
Before starting regular service, check:
- Chataptor’s account has been verified,
- website added,
- widget appears on the page,
- a test conversation was completed,
- necessary social channels have been connected,
- Meta Business permissions checked,
- Allegro account connected,
- e-mail box connected,
- a test was performed for sending and receiving emails,
- translations enabled,
- the first message templates have been prepared,
- has defined who in the company responds to new conversations.
All messages and languages in one place
Launching multi-channel customer service sounds like a big project until each channel is broken down into a few simple steps.
First you create an account. Then you open the Channels tab, select the integration you need and go through the process of logging in or pasting your access data.
After completing the configuration, messages from the website, WhatsApp, Facebook, Instagram, Allegro and e-mail can be sent to one panel. If a customer writes in a foreign language, the communication can be automatically translated.
You don’t have to rebuild the entire customer service at once. It is best to start with the channel from which most messages come, check the entire process, and then connect others.
If you don’t know which channel to start with or you stop at some stage of configuration, write to us. We will help you go through the implementation and connect the necessary channels step by step.
FAQ
How to combine all customer messages in one place?
Create an account in Chataptor, go to the Channels tab and connect the message sources used by your company. You can add a website widget, WhatsApp, Facebook Messenger, Instagram, Allegro and email, among others.
Do you have to be a programmer to run Chataptor?
NO. Most channels connect by logging in and accepting permissions. Installing the widget requires pasting a short script, but it can be done via the store panel, WordPress plugin, Google Tag Manager or with the help of the person managing the website.
How to add free live chat to your website?
In Chataptor, add a page, go to the Widget Installation tab, copy the generated script and paste it before the closing tag </body> on your page.
Does Chataptor work with WordPress and WooCommerce?
Yes. The widget code can be added to the page footer using the script management plug-in or the wp_footer engine.
How to connect Chataptor with Shopify?
The widget code should be pasted into the theme.liquid file before the closing tag </body>. It’s a good idea to create a copy of your theme before editing.
How to connect WhatsApp to Chataptor?
In the Channels tab, click Connect a Number, log in via Facebook, select the correct business portfolio, WhatsApp Business account and number.
How to connect Facebook Messenger with Chataptor?
Click Connect Page, log in to Meta, grant the required permissions and select a page. When you return to Chataptor, select it again as the channel to serve.
How to connect Instagram with Chataptor?
The Instagram account should be professional and linked to the Meta portfolio. In Chataptor, click Connect Account, go through authorization and select the correct profile.
How to connect Allegro with Chataptor?
Create an application on the Allegro Developer website, set the Chataptor redirection address, copy the Client ID and Client Secret, and then paste them in the Allegro channel settings.
How to connect Gmail with Chataptor?
A corporate Google Workspace account may require admin approval of the app. For personal Gmail, you can use your app password after turning on two-step verification.
Can I connect my own company mailbox?
Yes. You can connect the mailbox via IMAP and SMTP or configure the redirection of incoming messages.
Do you need to know foreign languages to support international customers?
You don’t need to know every customer’s language. Chataptor can automatically translate messages, so the customer writes in his own language and the support agent can work in English.
Keep reading
Related guides
Live Chat for Website: How It Works, What to Choose and How to Add It
Looking for live chat for website use? Learn how website chat works, which features matter, how to install a widget and choose the right software.
Omnichannel customer service: bring every channel into one inbox
Learn what omnichannel customer service means and how to bring live chat, email, social media, WhatsApp and marketplace messages into one inbox.
Tawk.to - best alternatives and feature comparisons
Learn what tawk.to is, whether it is really free, which features it offers, where it works well and when it makes sense to choose a tawk.to alternative.